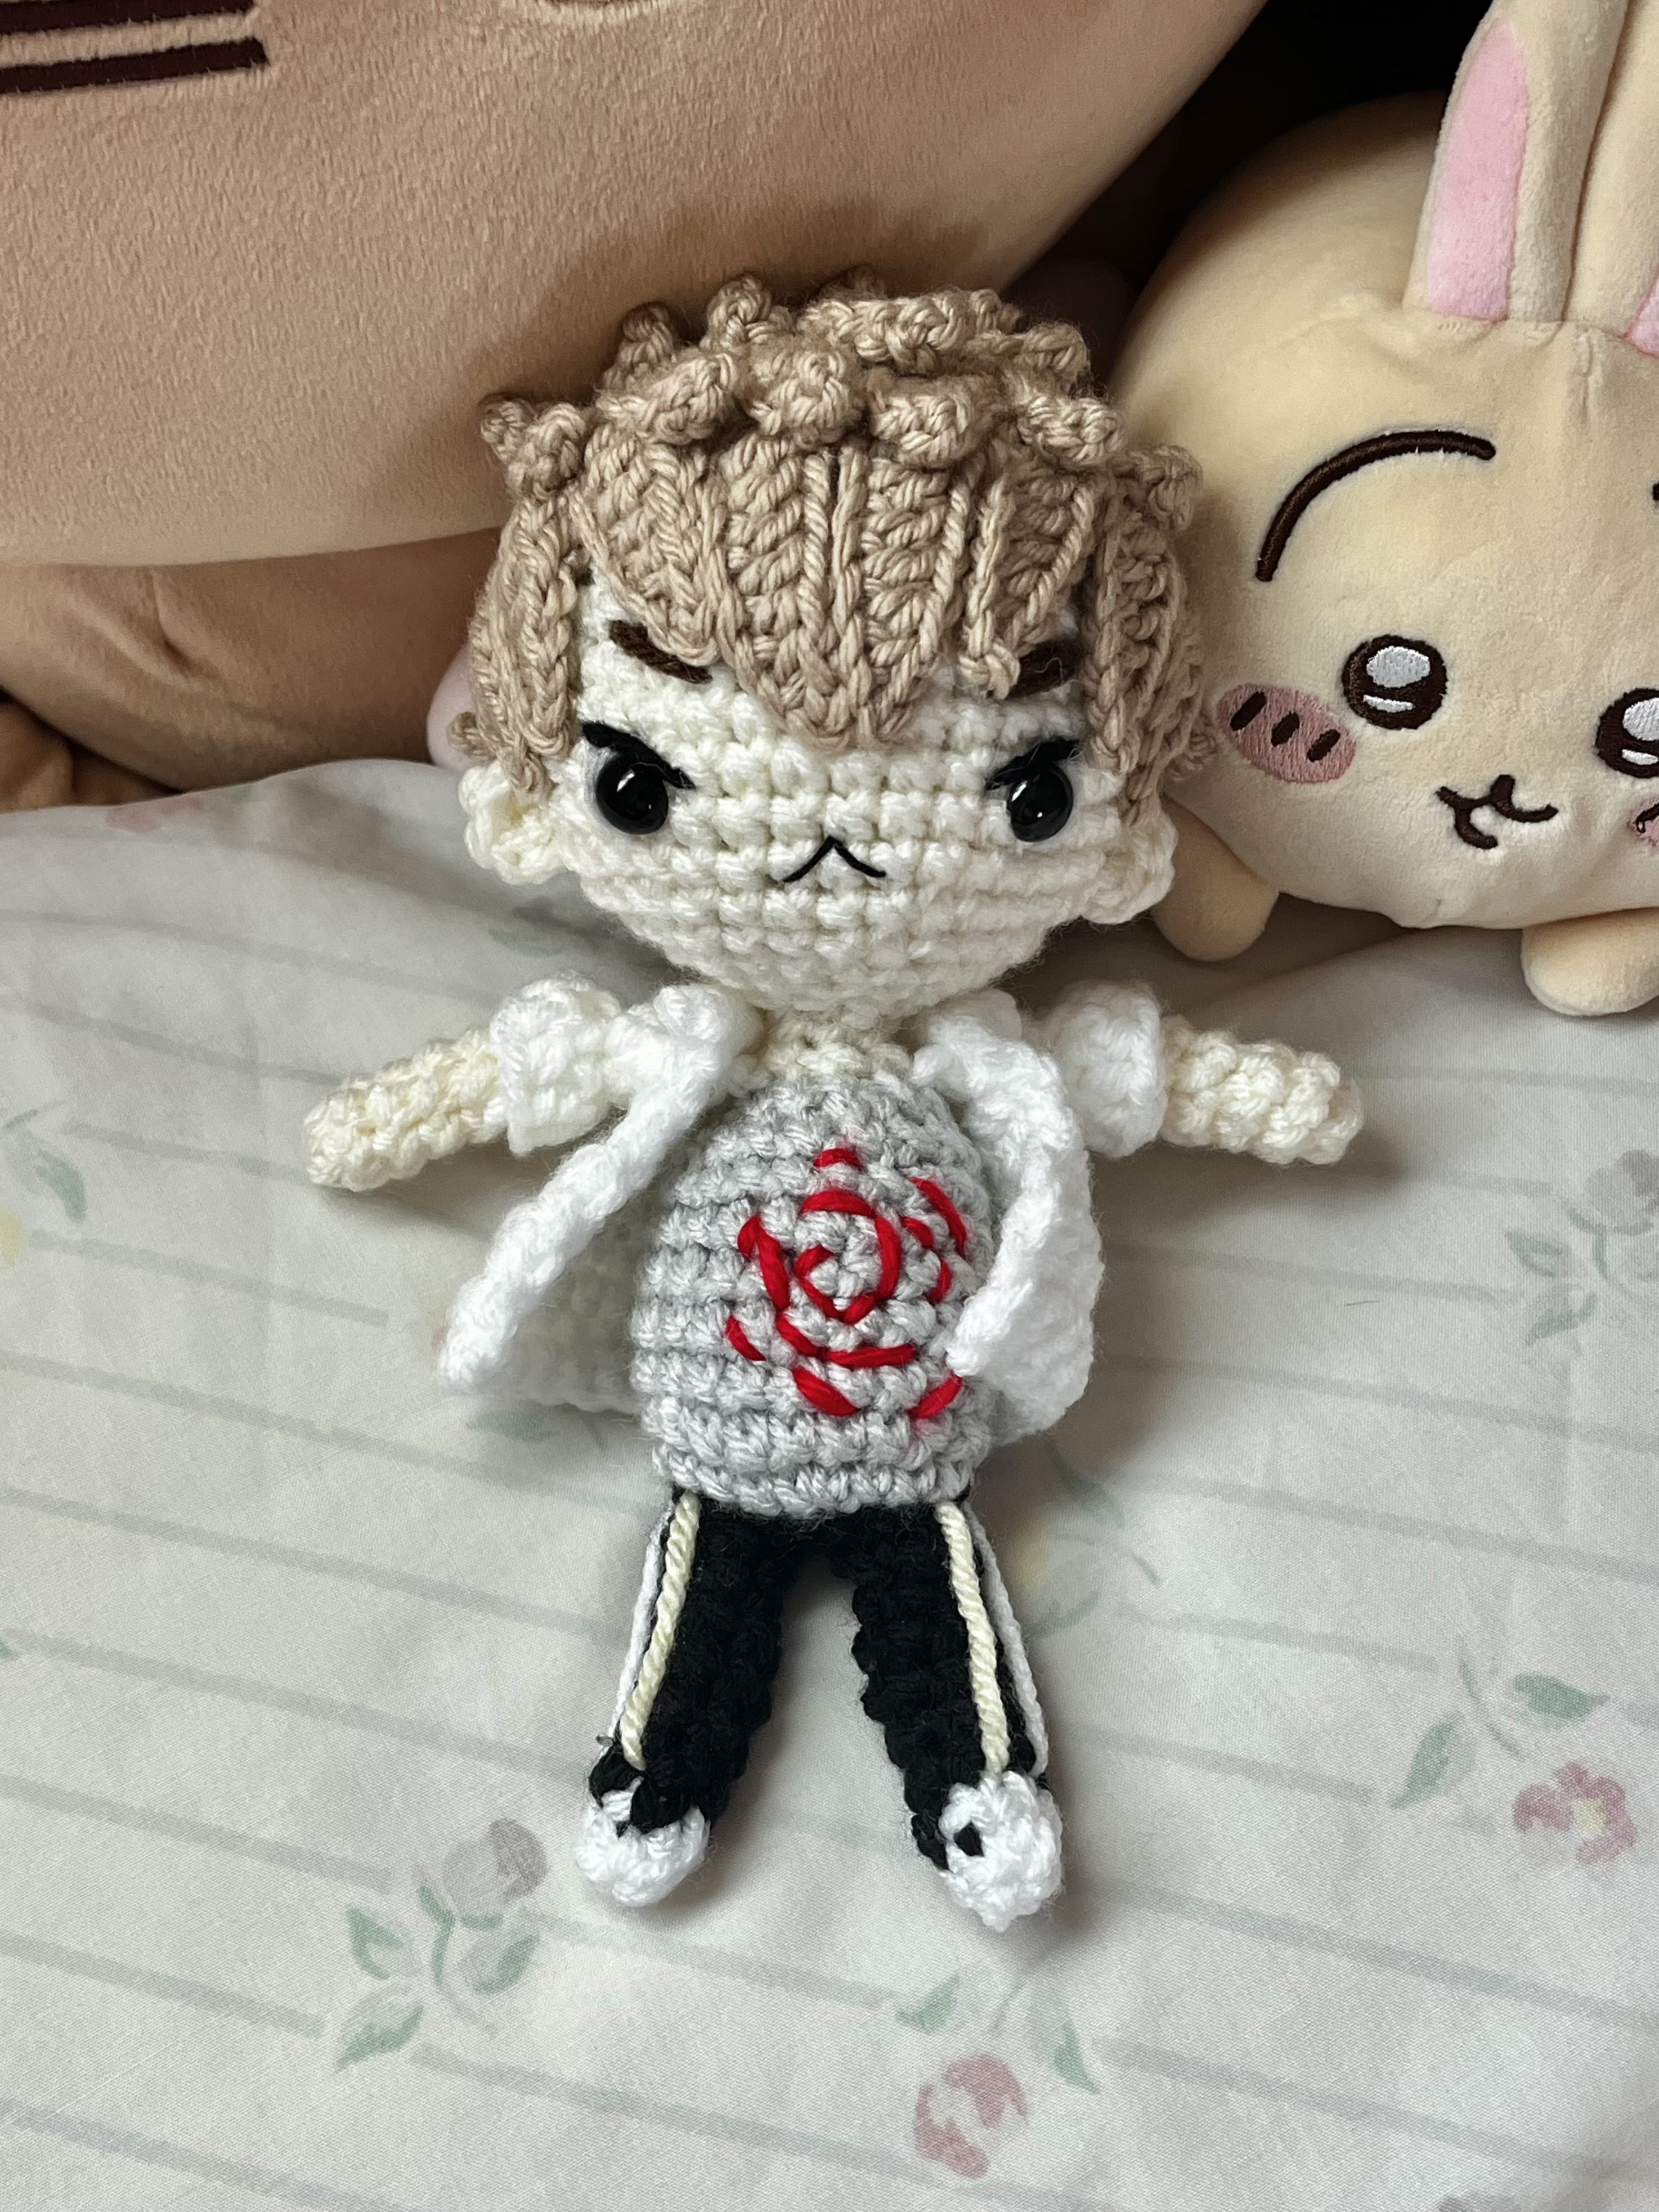
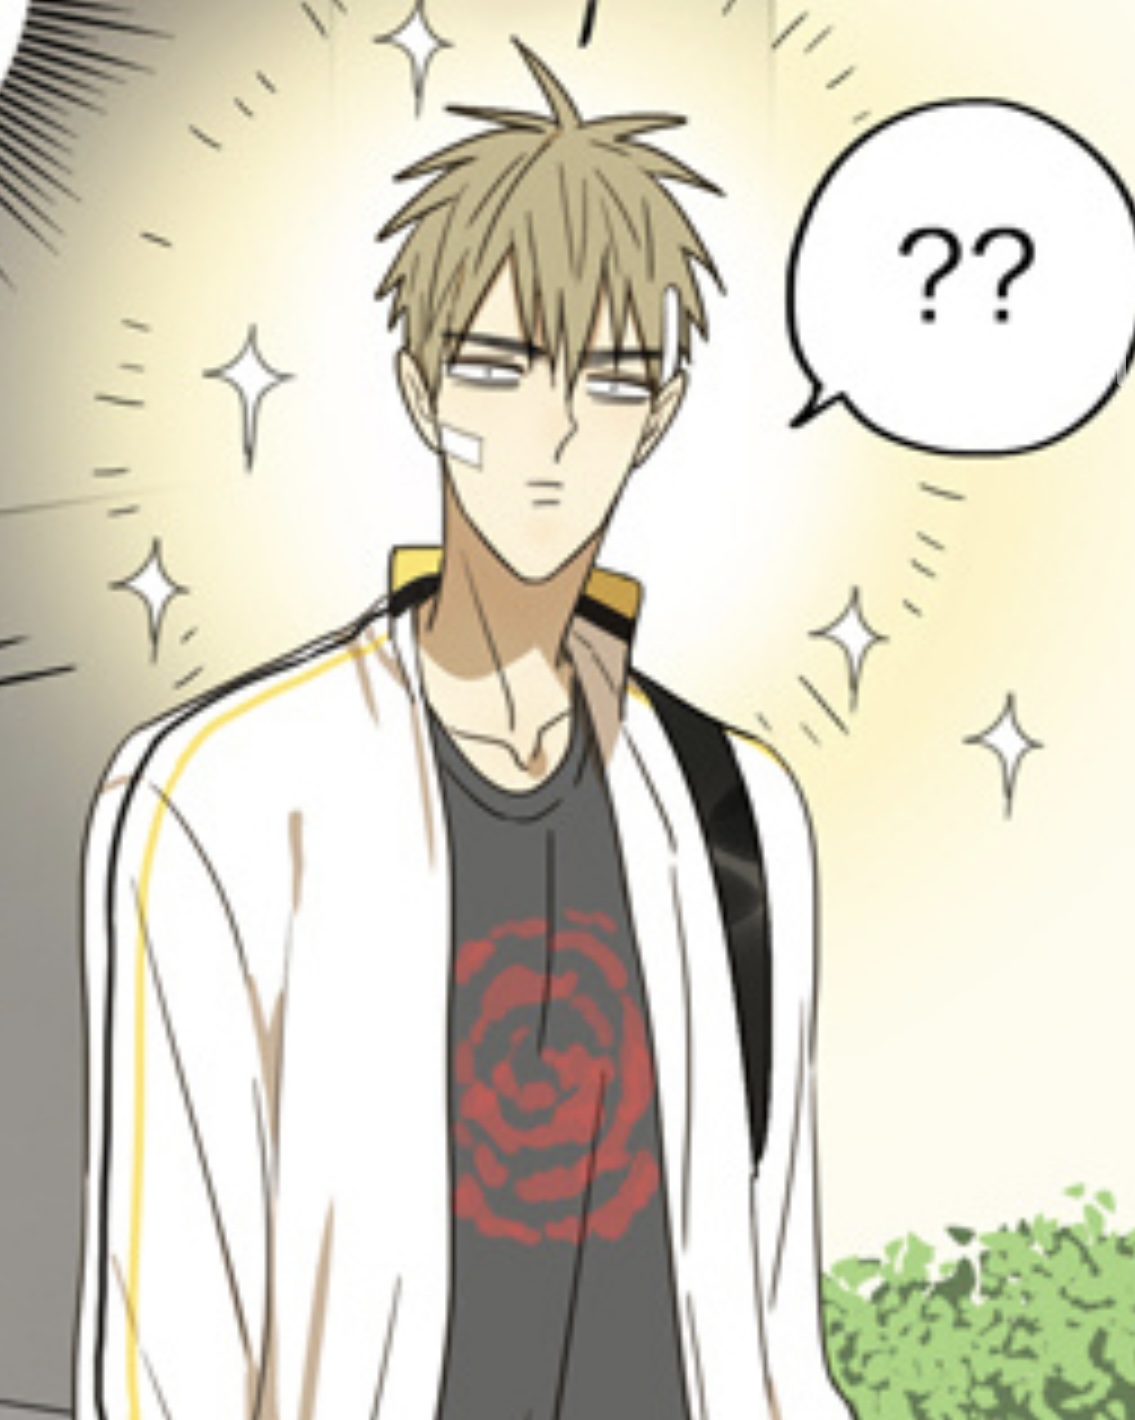
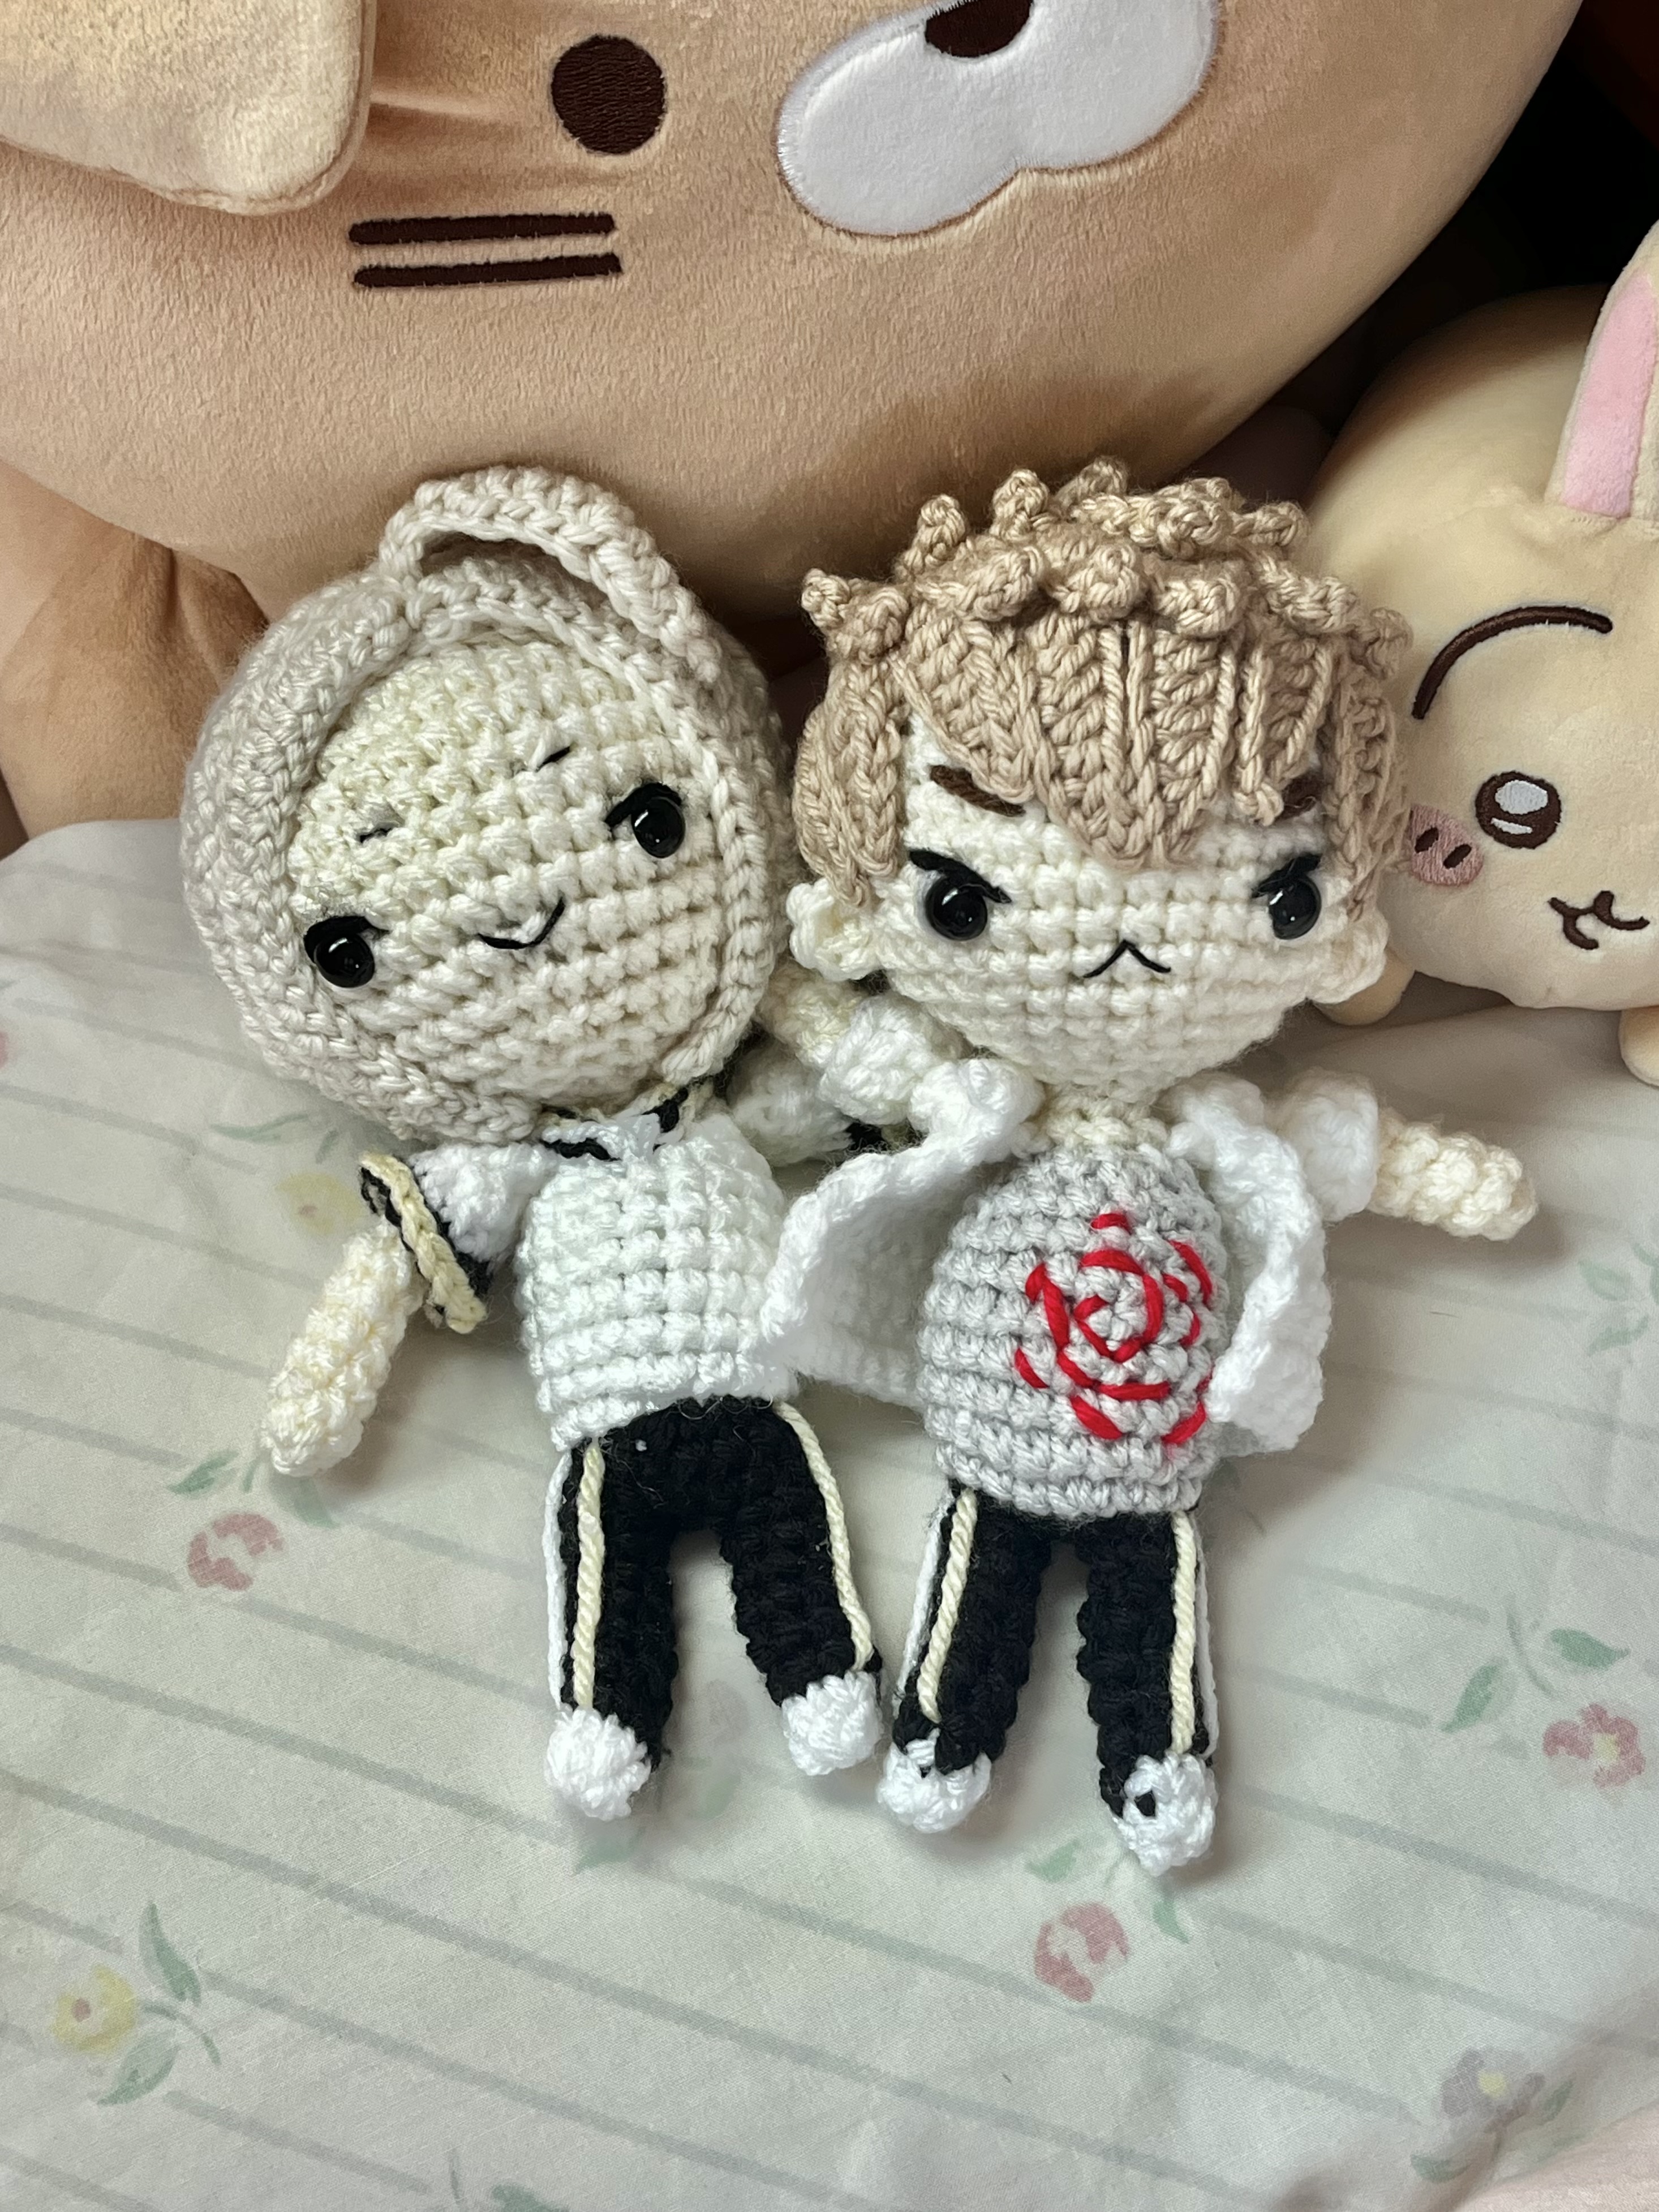
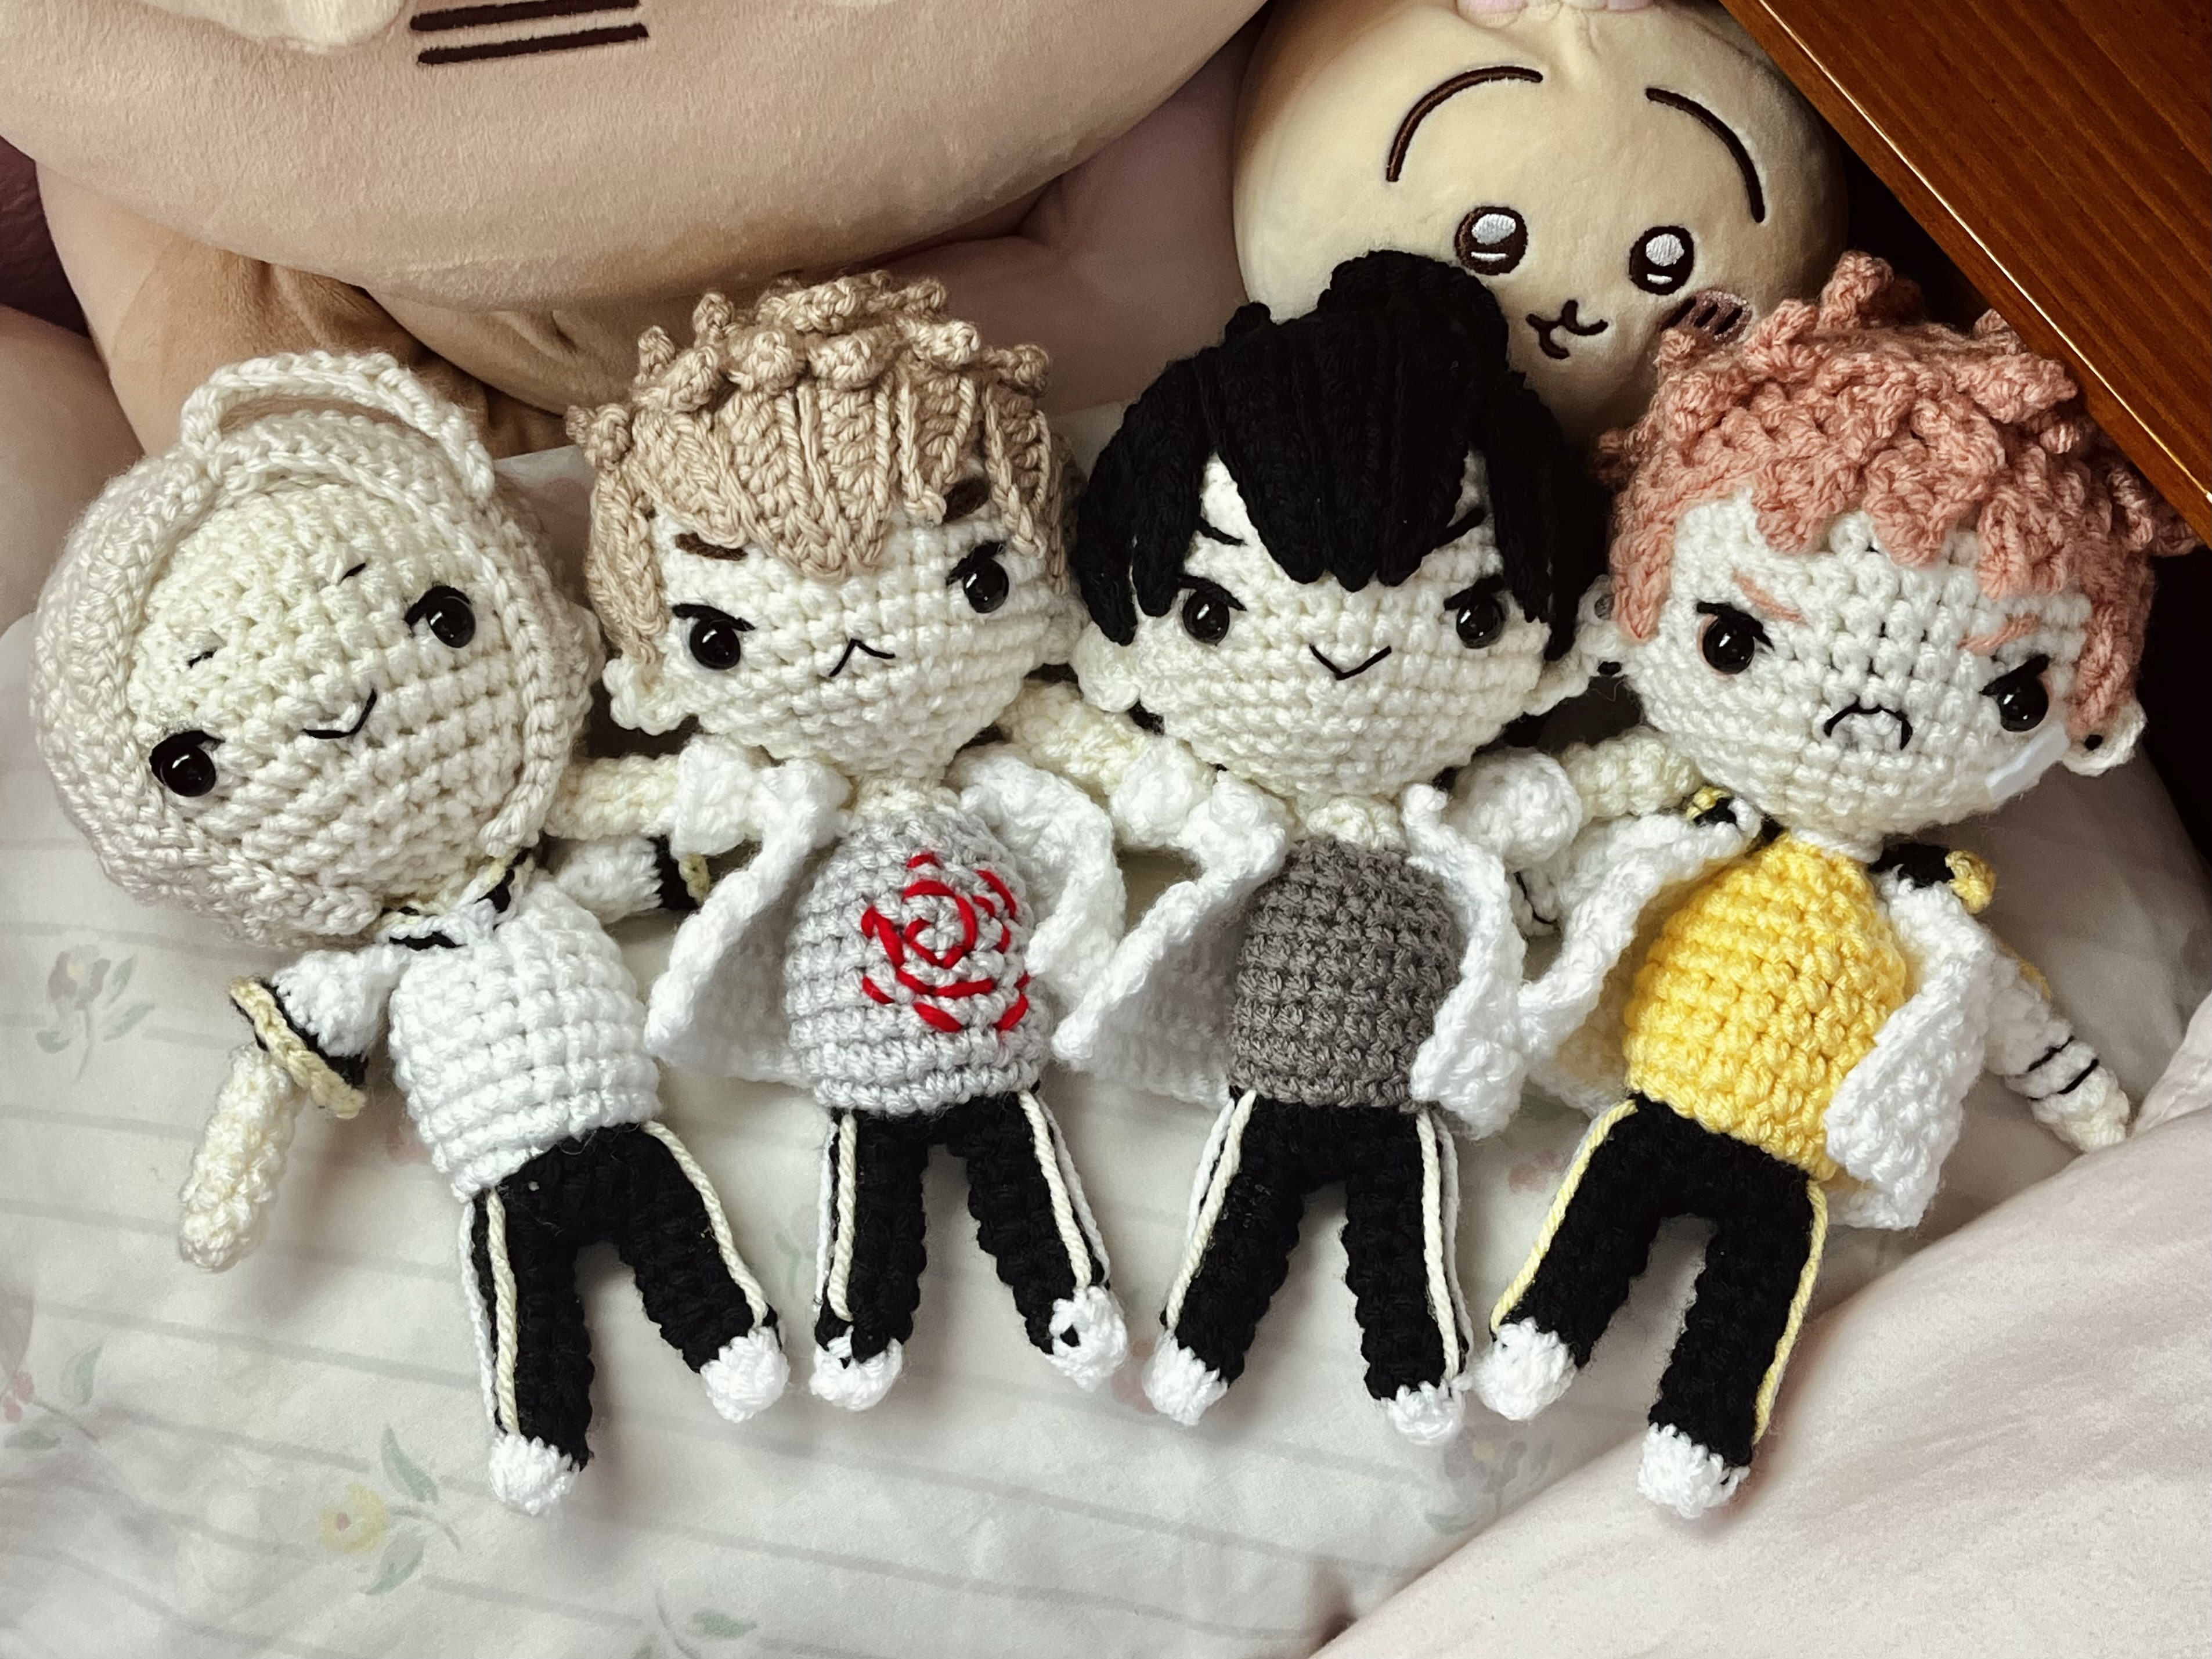
Finally finishing the main four of 19 Days, here’s Zhan Zheng Xi! ᕕ( ՞ ᗜ ՞ )ᕗ His pattern is actually really similar to He Tian's!


🍀 Materials needed:
3.5 mm crochet hook (E)
sewing needle
scissors
fabric glue (optional)

yarn (see below)
🍀Yarn colors you'll need:
White
Black
Ivory
Tan
Grey
Red
🍀 Abbreviation guide:

sc= single crochet
hdc= half double crochet
dc= double crochet
trc= treble crochet
slst= slip stitch
inc= increase
dec= decrease
ch= chain
st= stitch
FLO= front loop only
BLO= back loop only
cc= color change
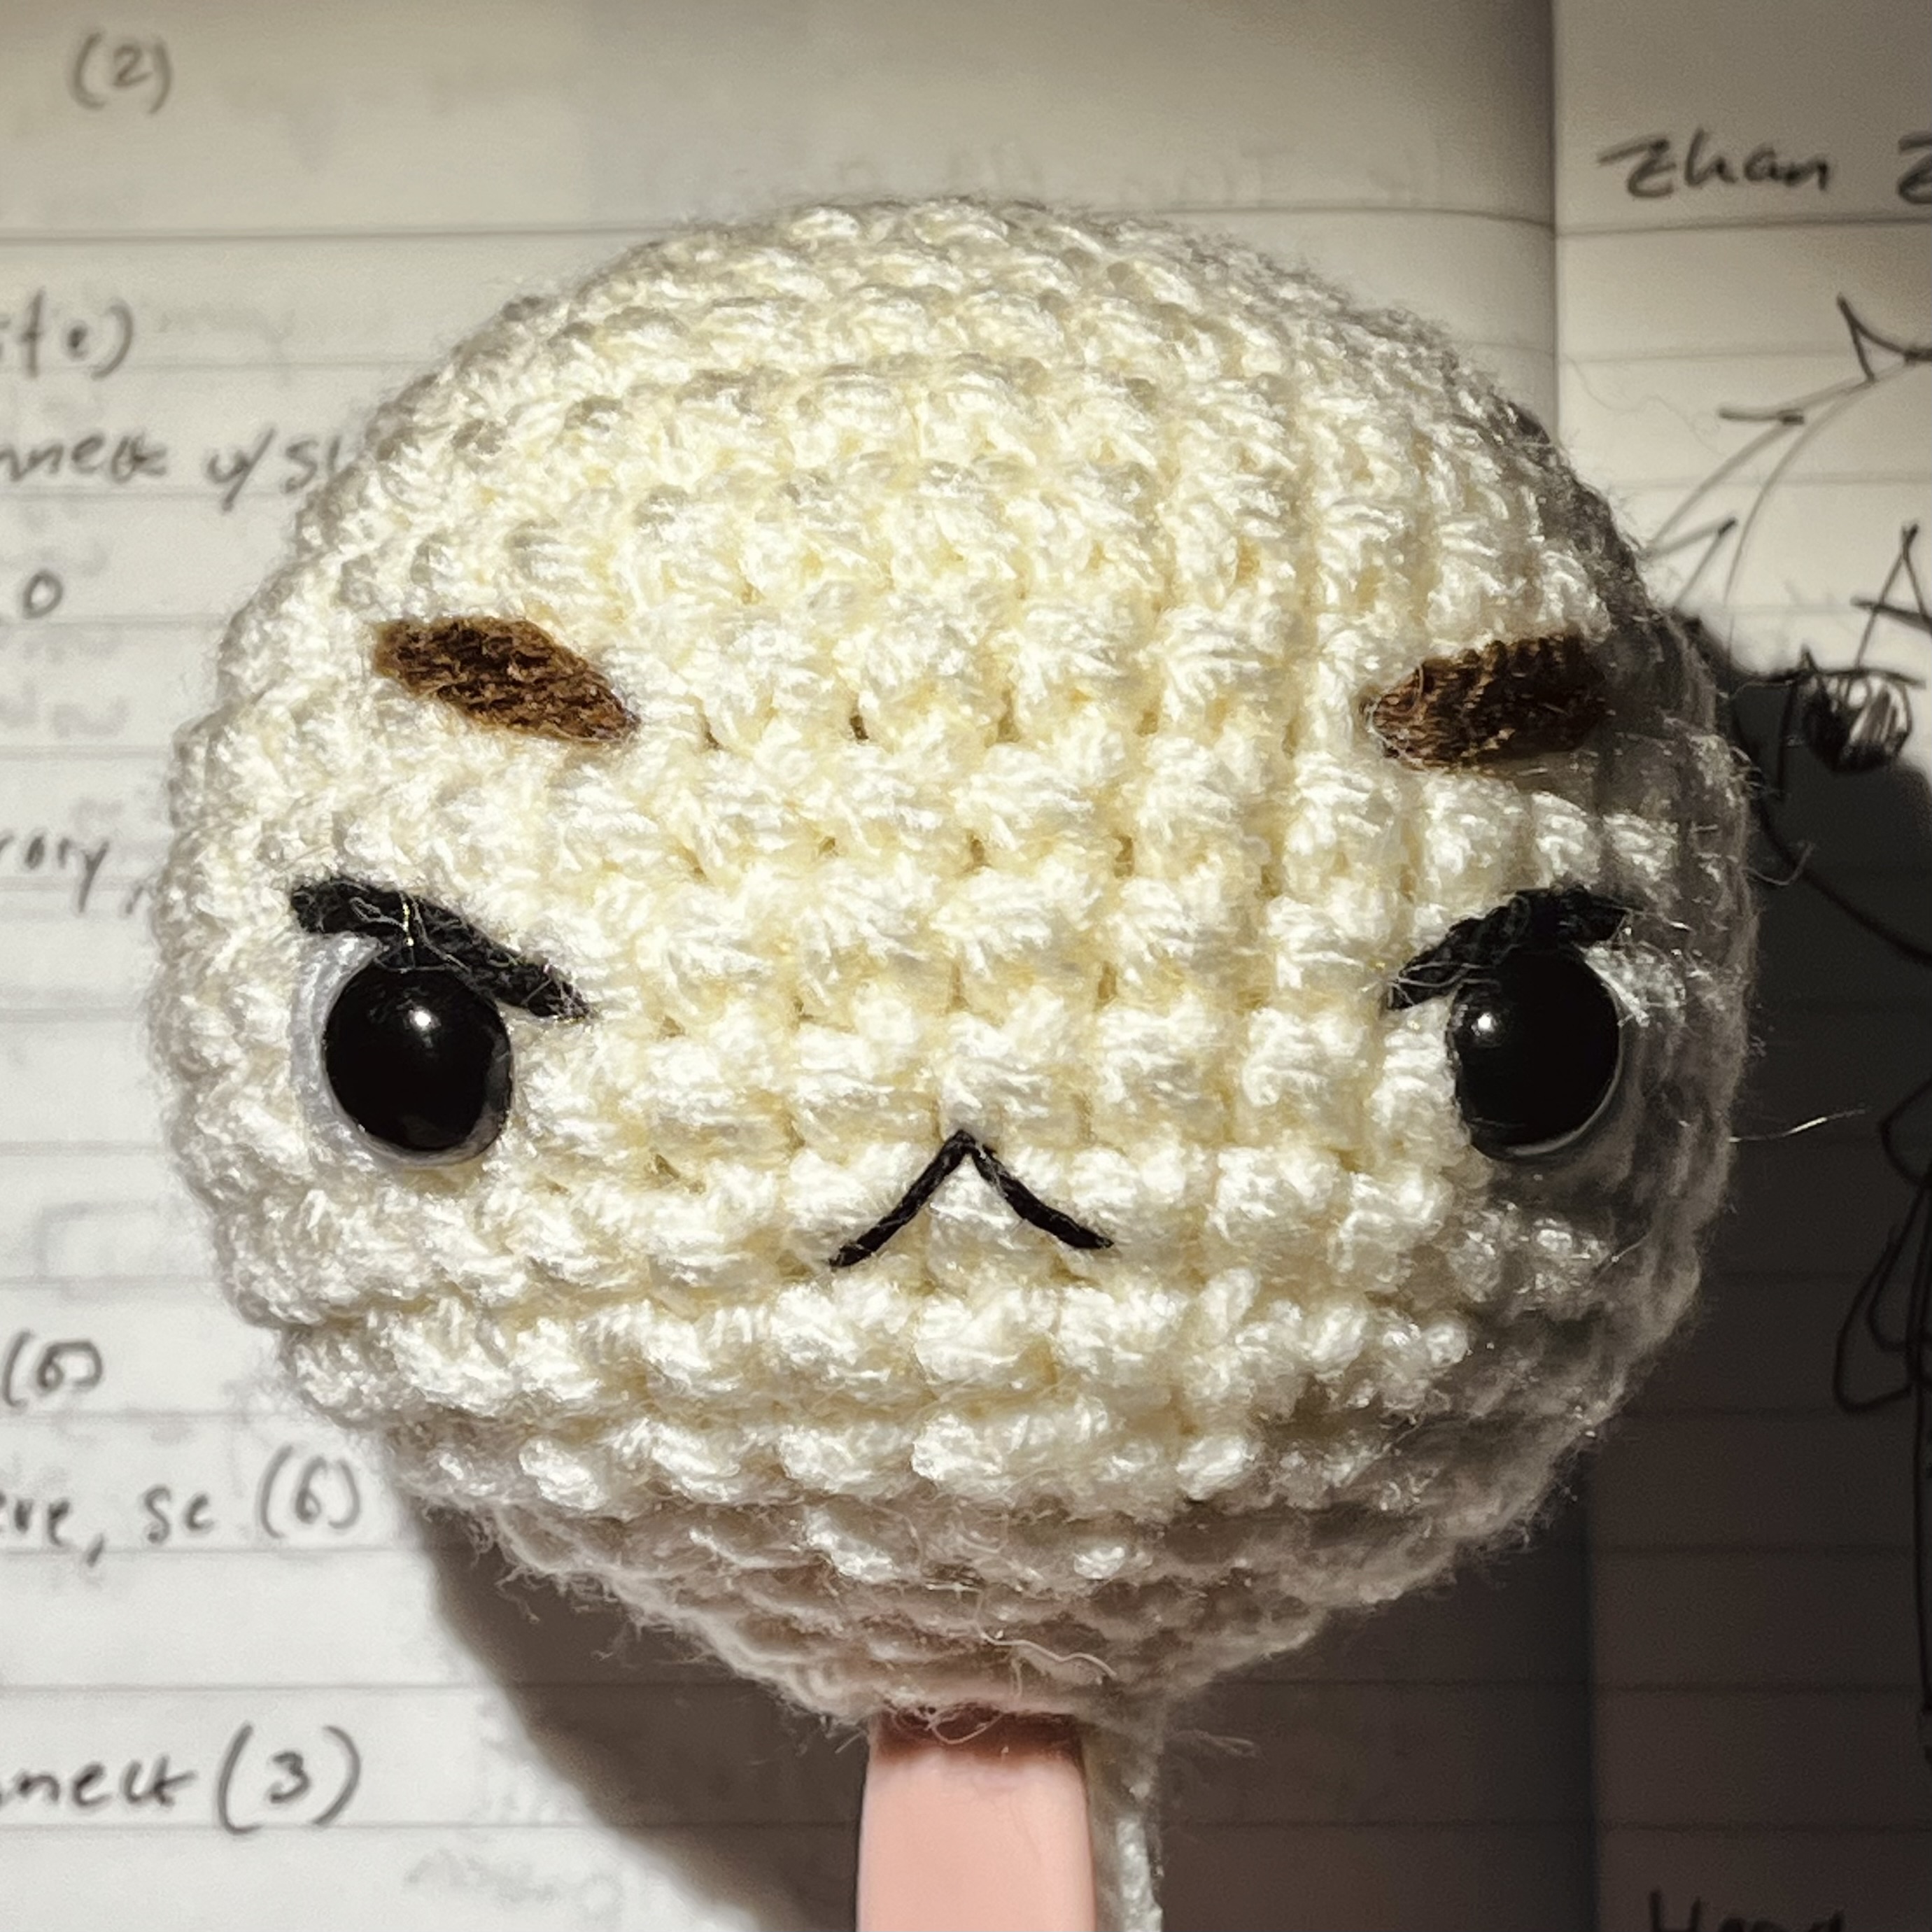
R1: 6 sc in magic ring (6 st)
R2: inc all around (12 st)
R3: 1 sc, inc (18 st)
R4: 2 sc, inc (24 st)
R5: 3 sc, inc (30 st)
R6: 4 sc, inc (36 st)
R7-13: sc all around (36 st)
R14: 4 sc, dec (30 st)
R15: 3 sc, dec (24 st)
R16: 2 sc, dec (18 st)
Put safety eyes between R11-12 with 8 sts in between, embroider face
R17: 1 sc, dec (12 st)
Begin stuffing
R18: 1 sc, dec (8 st)
Finish stuffing, finish off and leave a tail. Connect body and head.
☘️ Legs (make 2, starting with white)
R1: 6 sc in magic circle (6 st)
R2: cc to black, sc all around (6 st)
R3-8: sc all around (6 st)
*Finish off if this is the first leg but if it is the second, ch 2 and connect to the first leg, do not finish off and continue to the body.
☘️ Body (continue with black)
R9: Continuing from the two legs, sc all around (16 st)
R10: sc all around (16 st)
R11: cc to grey, sc all around (16 st)
R12: 3 sc, inc (20 st)
R13-17: sc all around (20 st)
R18: 3 sc, dec (16 st)
R19: 2 sc, dec (12 st)
R20: sc, dec (8 st)
Finish off
☘️ Sleeves (make 2, in white)
R1: ch 9, connect ends with a sl st
R2: 9 hdc
Finish off
☘️ Arms (make 2, starting with ivory)
R1: 6 sc in magic circle (6 st)
R2-5: sc all around (6 st)
R6: cc to white, sc all around (6 st)
R7: connect sleeve while sc all around (6 st)
R8-10: sc all around (6 st)
R11: squish and crochet both sides together (3 st)
Finish off, leave a tail and attach to body!
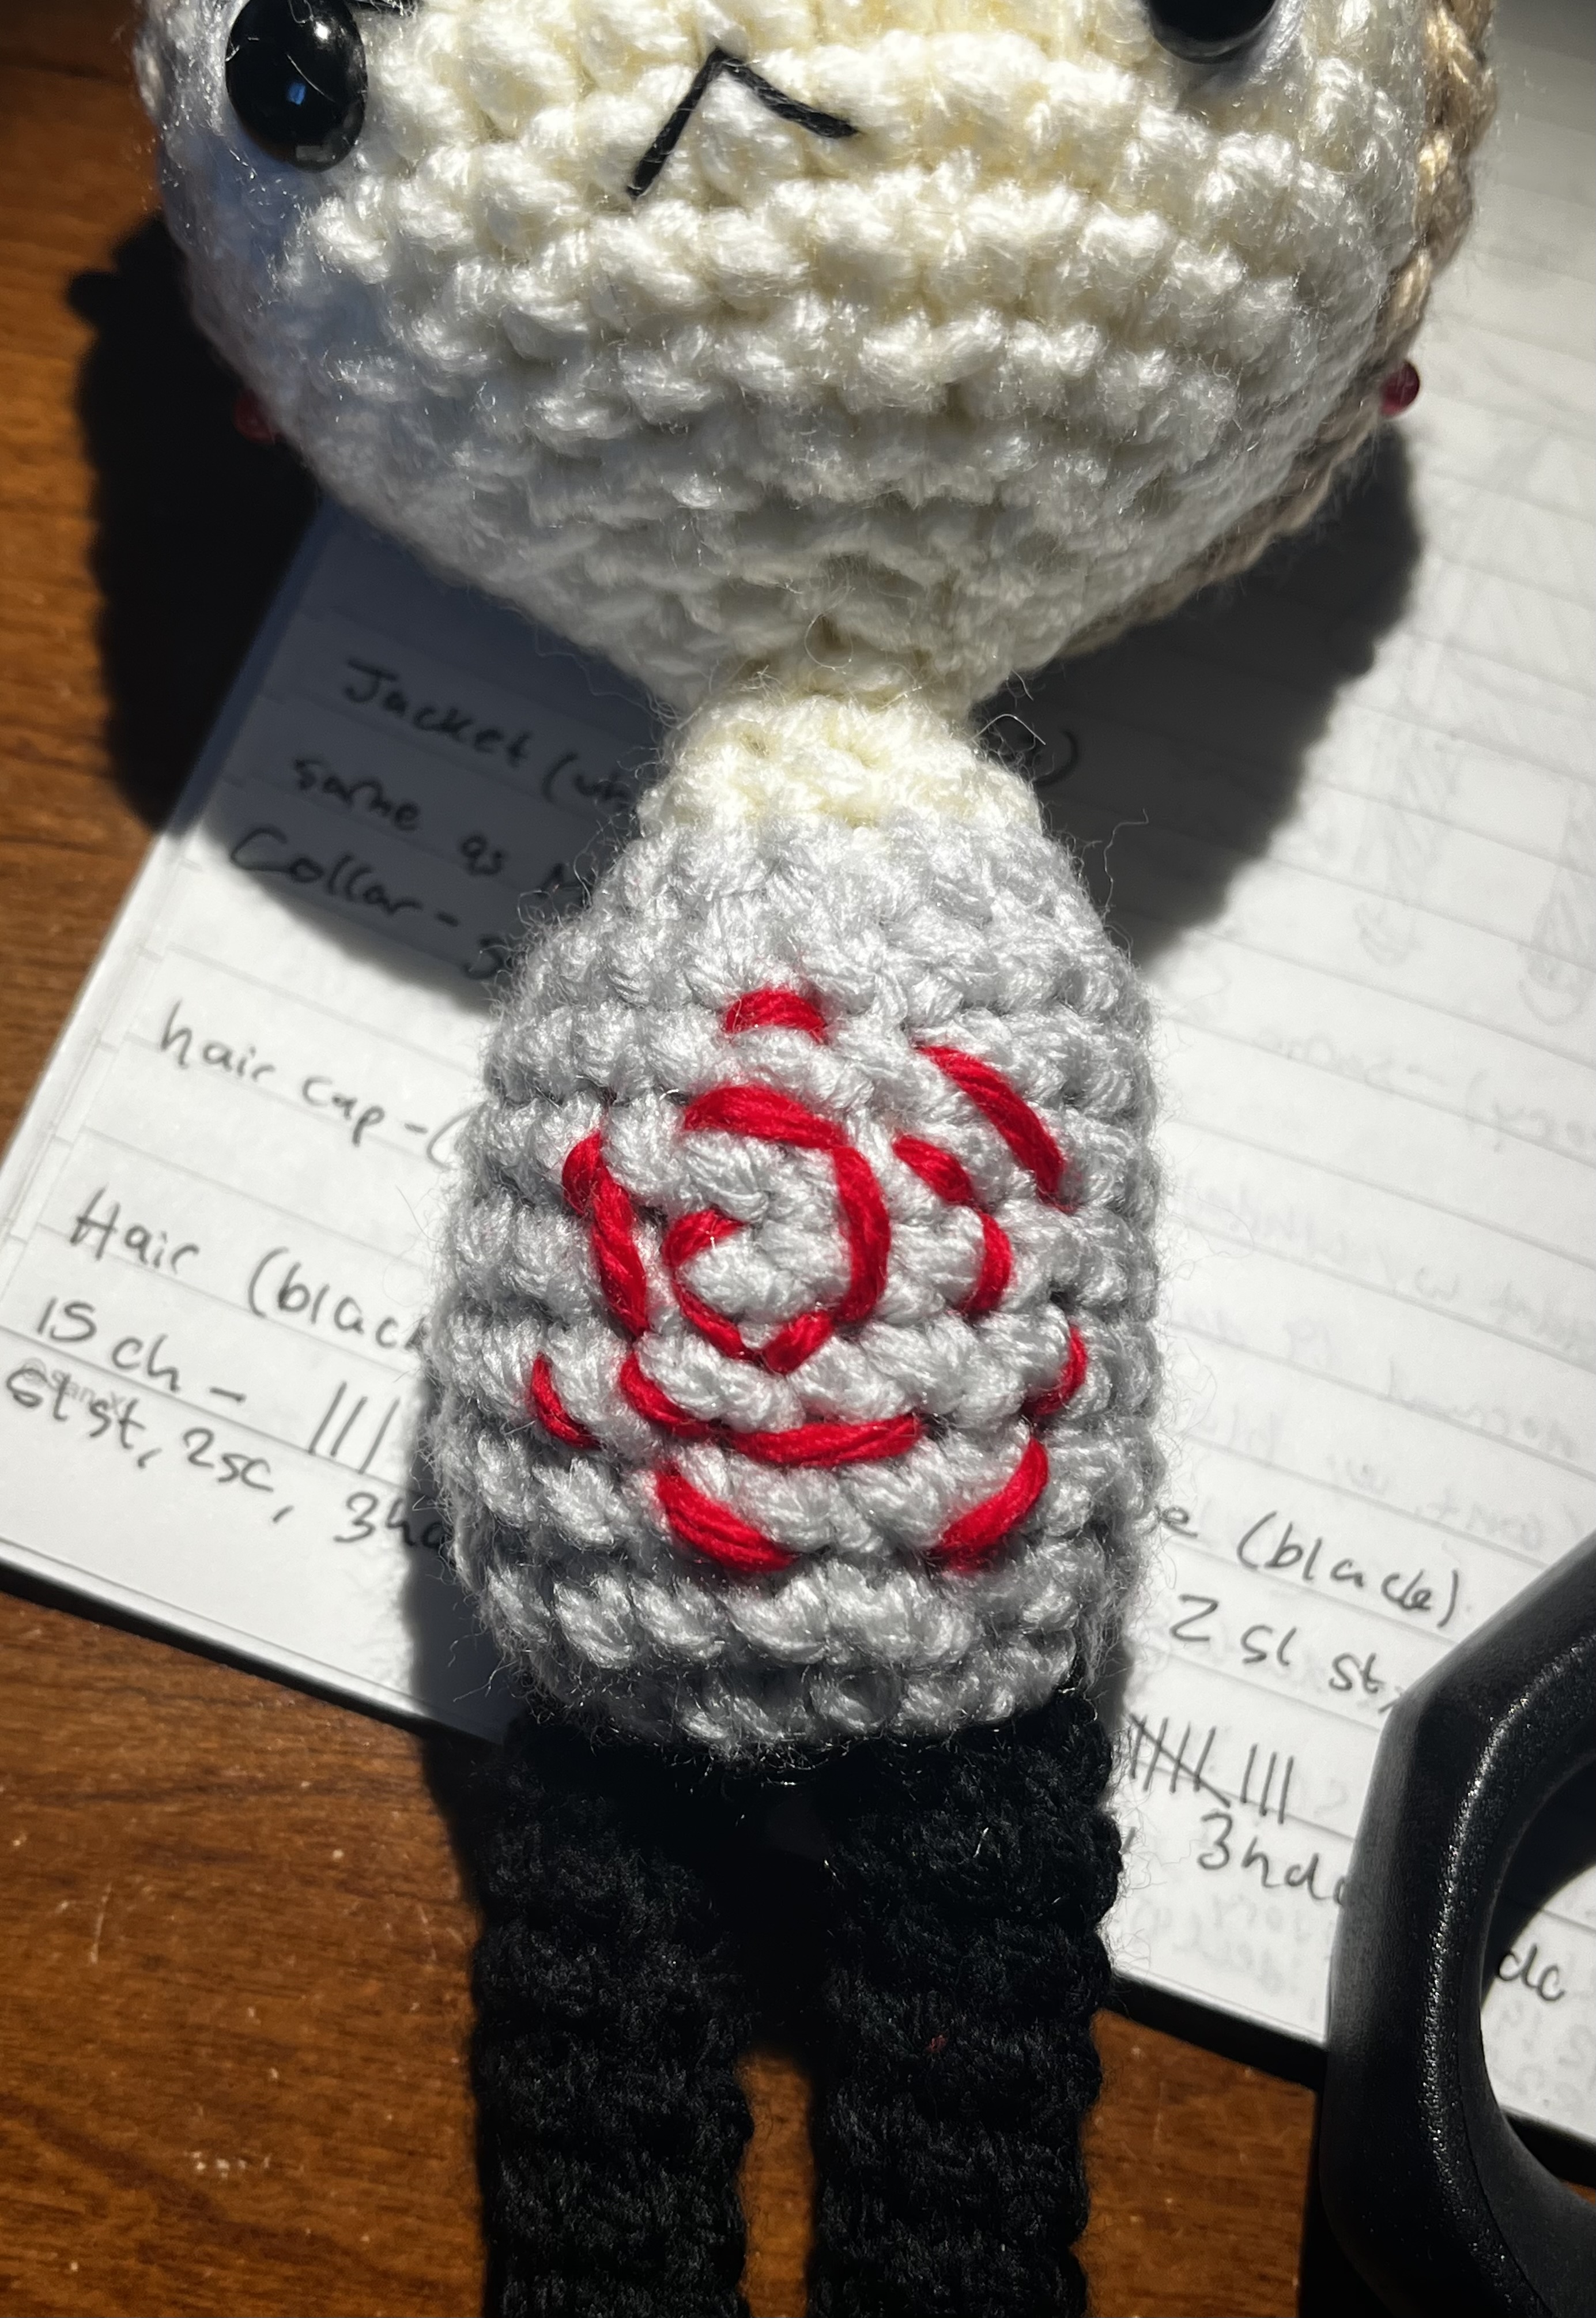
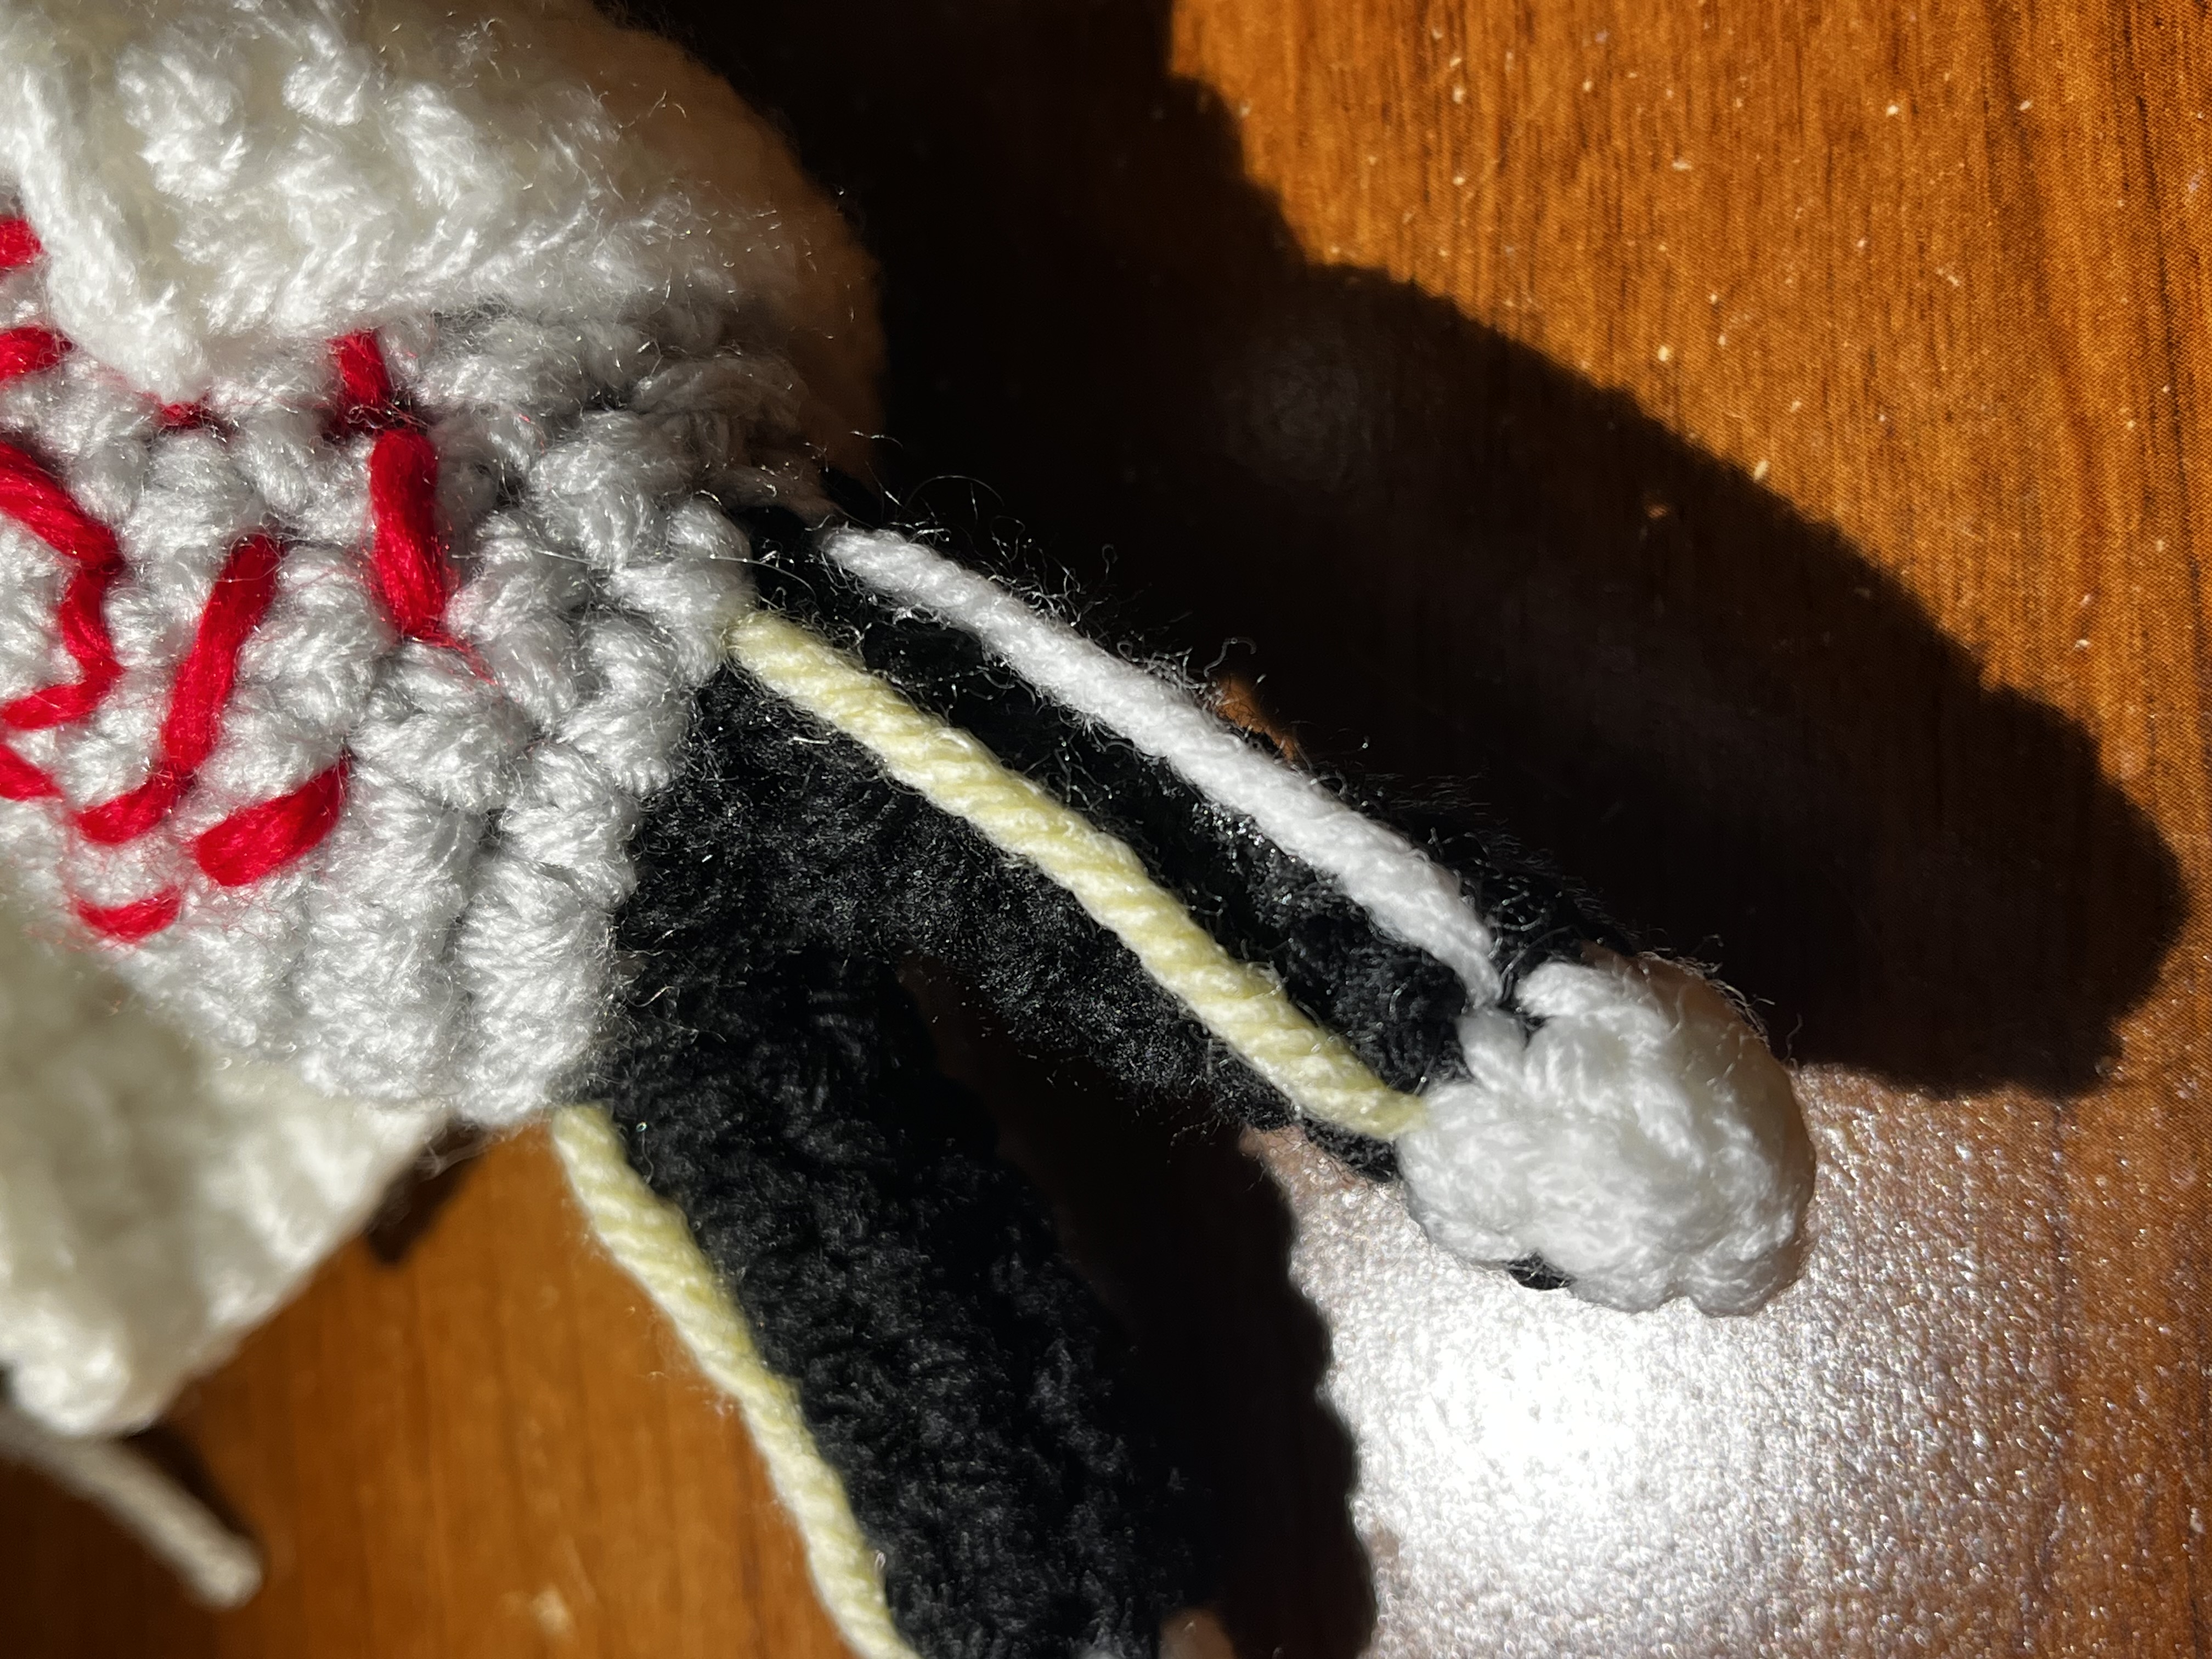
☘️ Jacket (in white)
*this will be worked in rows
R1: ch 14 (13 st)
R2: 2 sc, ch 3, skip 3 st, 3 sc, ch 3, skip 3 st, 2 sc (13 st)
R3: 5 sc, 3 inc, 5 sc (16 st)
R4: 6 sc, 4 inc, 6 sc (20 st)
R6-10: sc in each stitch (24 st)
Finish off
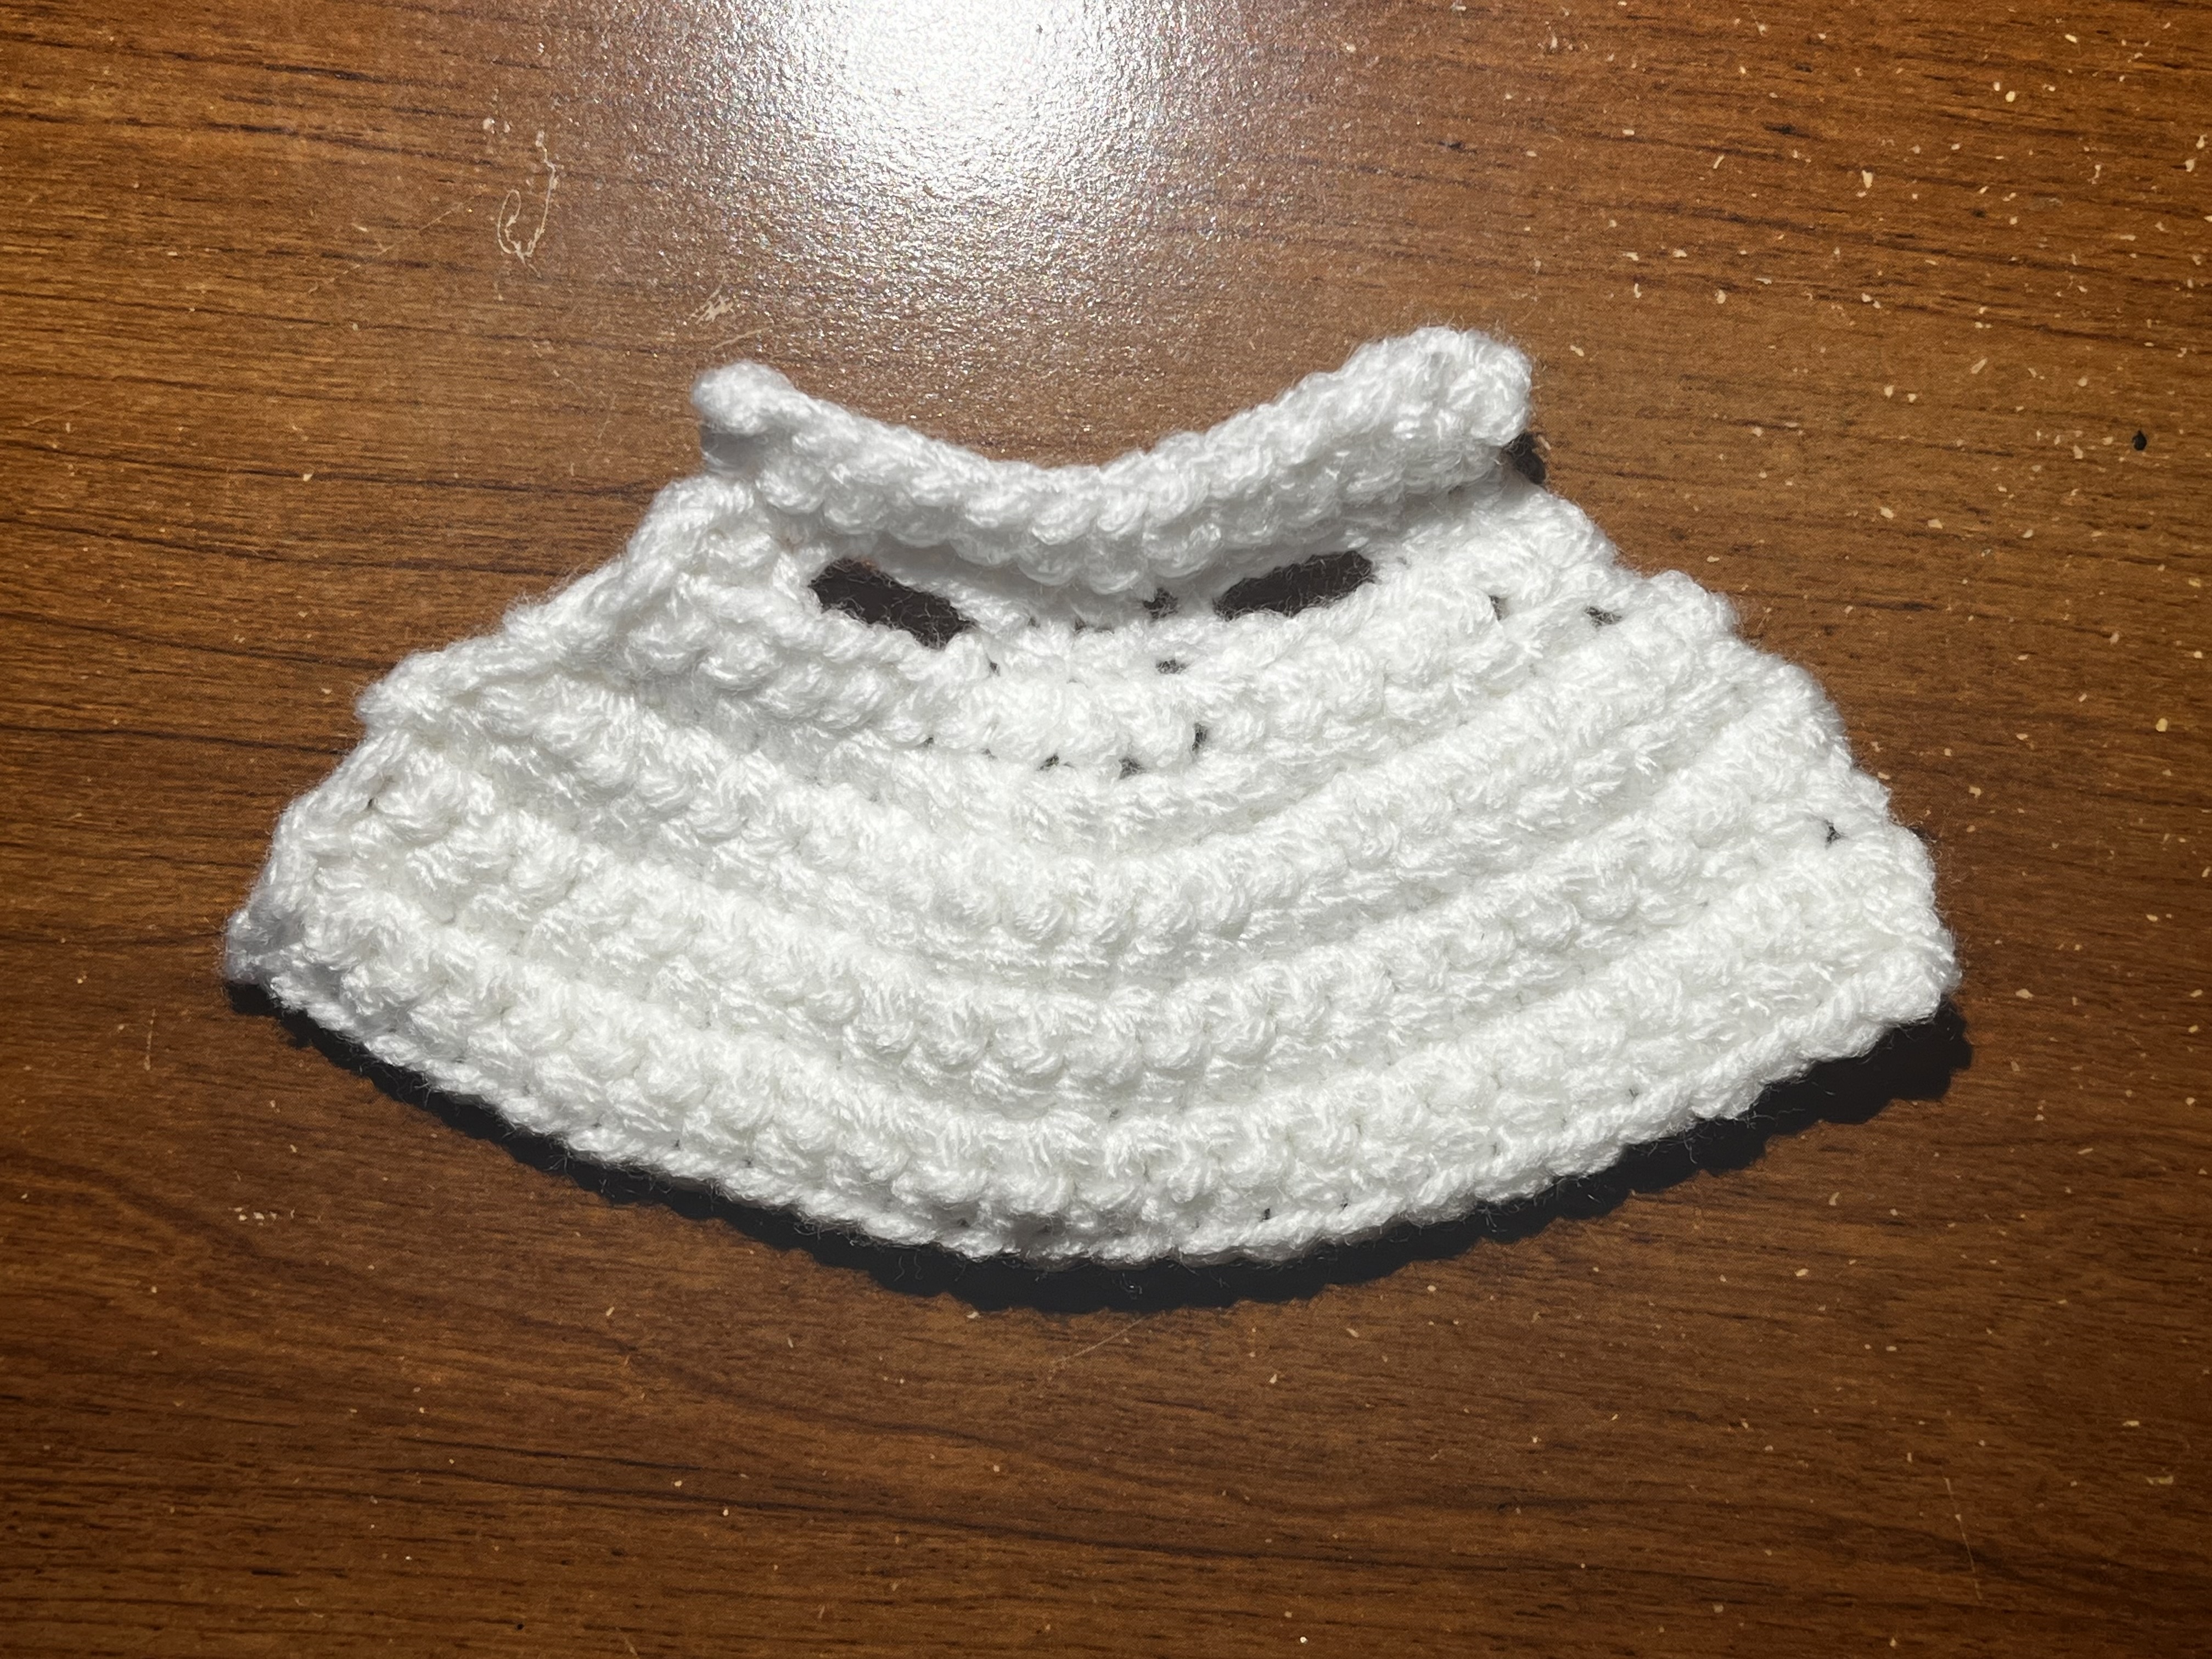
☘️ Collar (in white)
R1: ch 14 (13 st)
R2: sc across (13 st)
Finish off
*connect the collar to the top of the jacket by sewing
☘️ Ears (make 2, in ivory)
R1: 4 sc in magic circle (4)
☘️ Hair cap (in tan)
R1: 6 sc in magic circle (6 st)
R2: inc all around (12 st)
R3: 1 sc, 1 inc (18 st)
R4: 2 dc, 1 inc of dc (24 st)
R5: 3 dc, 1 inc of dc (30 st)
R6: 4 dc, 1 inc of dc (36 st)
R7-8: dc in each stitch around (36 st)
Finish off with 2 hdc, then 2 sc, and then 2 slst (2 hdc, 2 sc, 2 slst). Weave in the ends.
☘️ Hair (in tan)
Refer to images below as to where to put the hair strands, a lot of this step will depend on your own creativity (make as you see fit!)
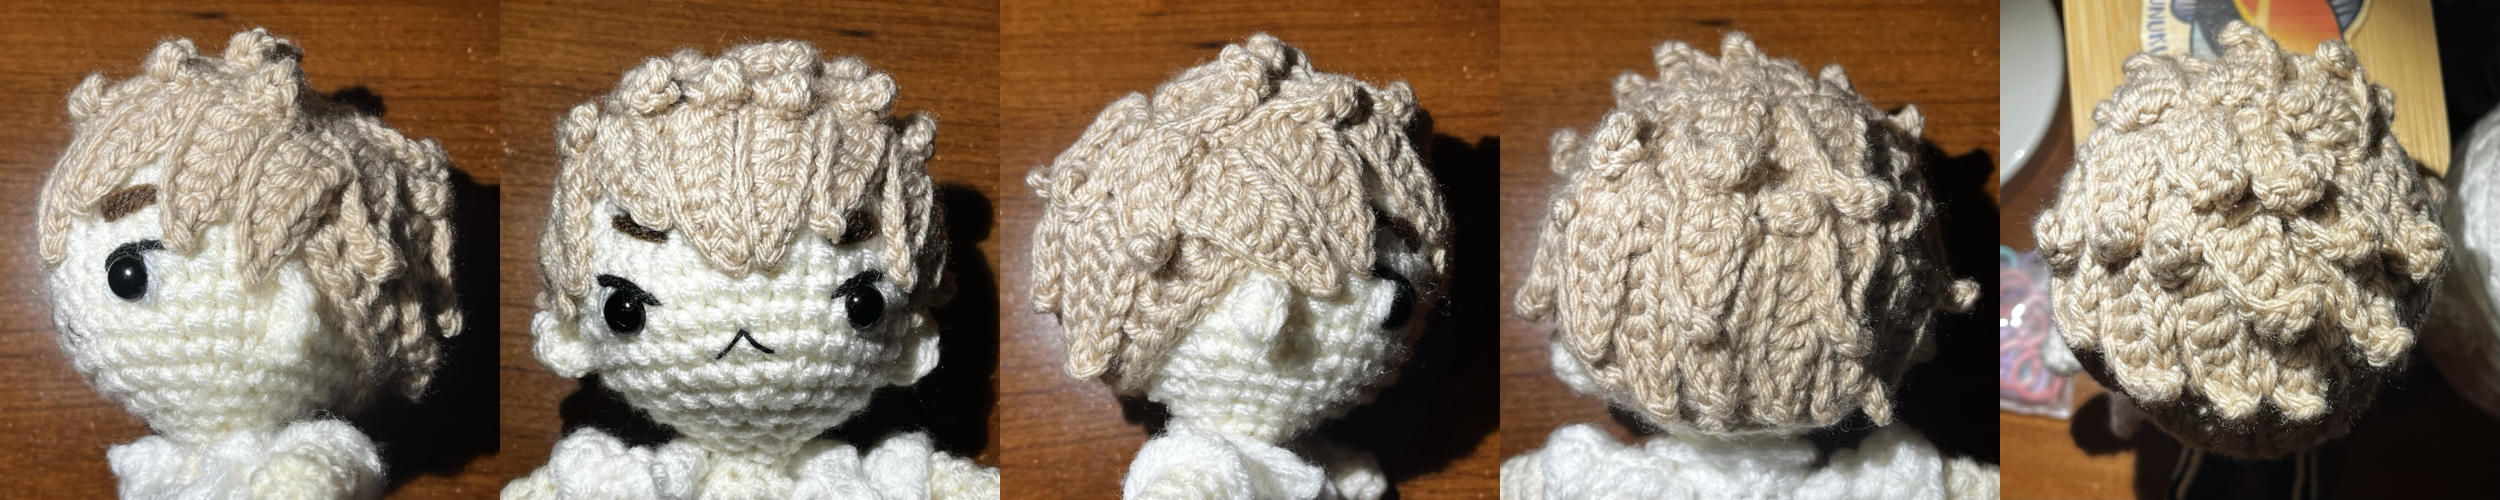
Make: (these are what I used but feel free to alter amount/chain)
8 ch (39)
sl st, sc, hdc, 4 dc
🍀 Assembly
1. Attach head, ears and arms to the body
2. Embroider the face onto the head if not already done
3. Embroider t-shirt design with red yarn onto body
4. Put jacket on (it'll be a little difficult due to the sleeves but it will fit)
5. Attach hair cap on head and begin attaching the hair chains in place
6. Embroider black and yellow stripes onto pants
And you're done! Hope this pattern made sense (’∀`)ゝ” if you're confused feel free to message me on Ravelry or comment!


No comments:
Post a Comment